Schedule Setup Part 1: All Schedules
We discuss the Individual Schedules tab in Part 2 of the Schedule Setup training. Check out the Individual Schedule training by clicking here.
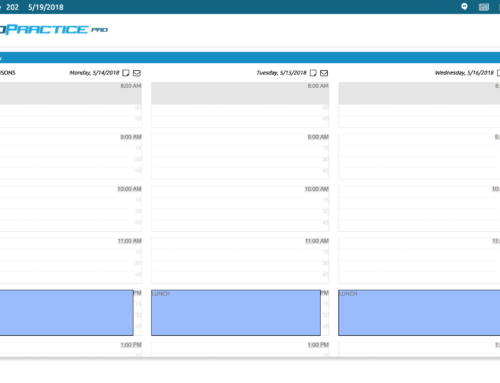
The second tab of the setup window involves schedules. This window is further divided into two additional tabs. One for All schedules and how they display and one for individual schedules and the items associated with each schedule.
First lets look at the options for All the schedules. The first two options allow patients to schedule or cancel appointments online. When the patient logs into the patient portal, he or she will see a list of upcoming appointments. If the first checkbox is checked, there will also be a button to allow the patient to schedule an appointment.
If the second box is checked, there will be a cancel button next to the appointment that will allow them to cancel the appointment. Both of these options allow you to limit when the patient can do this. For instance, if you did not want patients cancelling within 24 hours, you can limit the cancellations by placing 24 in the box that says “Disallow within blank hours”.
The next box allows you to let the patient check-in to their appointment online. This means there will be a check-in screen on the patient portal. You can provide a kiosk or they can do it on their own device.
The next box allows you to enable a Schedule waiting list. If you have a full appointment schedule, you can place patients on a waiting list. If one of the appointments on that day get cancelled, you will be alerted that there is a patient on the waiting list.
The next box indicates that you would like to treat rescheduled appointments as cancelled appointments. On each appointment, there is a reschedule button. If this box is not checked, it will simply move the appointment to the new time and date. If this box is checked it will place a cancelled appointment on the schedule at the current date and time and create a new appointment at the new date and time. This is used if you want to track missed/cancelled or rescheduled appointments.
The default exam indicates the exam you would like to load when the “Default Exam Button” is clicked from an appointment on the schedule. You can choose any exam that is available in your system including a SOAP note, and initial exam, or a first call input for those working at the front desk. See more about this in our Exam Explanation Video.
Finally, the last section deals with what is displayed on each appointment in the schedule. Some of the items are displayed in line with the name and other data are displayed when you click and expand the appointment. Use this to customize exactly what you need to see on the appointment.
If you have any questions, send us a help request or an email at info@chiropracticepro.com.